Näytetään tekstit, joissa on tunniste Promarkers. Näytä kaikki tekstit

perjantai 22. elokuuta 2014

Vauvakortteja ja papereita/ Babycards and papers

Kovasti nyt tekee mieli tehdä vauvakortteja, lieneekö syynä ennen vuodenvaihdetta syntyvä kummityttöni...

I have made many babycards. Don't know is it becouse of my before new years born to be godchild.


Leima/ stamp: magnolia baby Tilda
Paperit/papers: Lidl
Väritys/colored: promarkers
Korttipohja/card: docrafts papermania 13,5cm x 13,5cm


Tänään satuttiin ajelemaan lidlin lähellä. Tuli pakottava tarve päästä sinne, koska melkeen sain kohtauksen, kun musta paperi oli loppua. Kyllä kannatti, tällaisia ihanuuksia tarttui matkaan.

Lovely papers I found from local Lidl.  Allmost had panic when realized I don't have black paper.


Tietysti myös yksivärisiä papereita oli sitten pakko ostaa. Varuiksi kolme pakettia xD

Of course I bought this basicpapers too, three pads just in case.


Nyt työstän promarker väriopasta. Keltaisten sivu on valmis.

Now working with promarker color guide. Yellows page is ready.


perjantai 15. elokuuta 2014

Mitä tarvitaan kortin tekemiseen? What do I need to make a card

Laiskuus on vaivannut kortin teon suhteen. Tämän jälkeen en kyllä ihmettele ollenkaan.

I've been too lazy to make a card. After this I no longer wonder why.


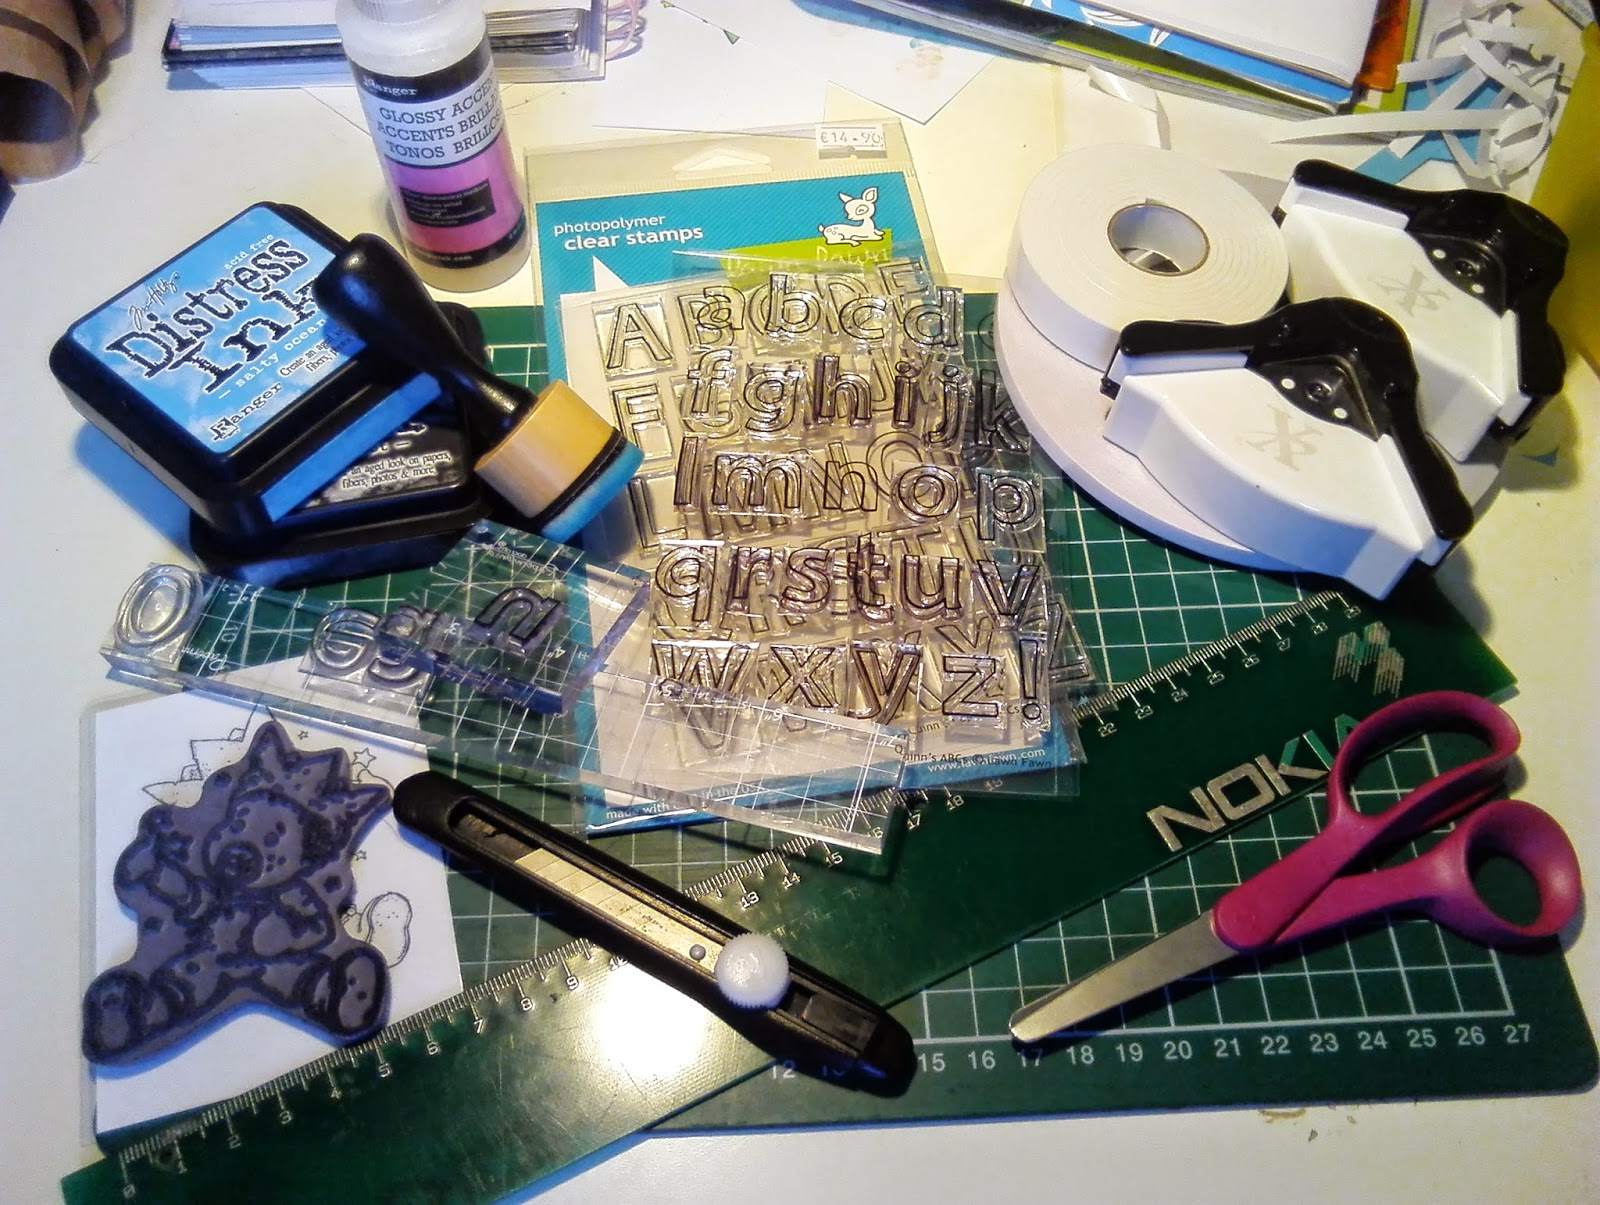
Tässä lähes kaikki käyttämäni tarvikkeet. Lisäksi tietenkin tarvin papereita ja korttipohjan.

Here is allmost everything that I needed to make my card. Of course I needed papers and cardbase all so.


Tässä suloiseen vauva Edwinin väritykseen käyttämäni promarkerit.

Here are promarkers that I used to color that lovely baby Edwin image.

Sitten itse kortintekoon. Leimasinkuvan distress inkien mustalla 4cc-paperille. Väritin promarkereilla. Mitä papereita käyttäisin? Leikkelin, leikin materiaaleilla. Katsoin videon kaksipuolisen teipin käytöstä. Videossa oli hyvä vinkki. Tässä teille vinkin esittely kuvin.

Then cardmaking part. I stamped image with black distress ink to 4cc-paper. Colored with promarkers. What paper to use? Cutting papers, playing with materials. I watched video how to use doublesided  tape. And there was very good tip in that video. I'll show it to You by pics.


 Ensiksi laittele teippi normaalisti paperin taakse.

First put tape normally to the back.

 Sitten poista vain osa suojasta ja taita ulos (kuten kuvassa näkyy).

Then peel, but not all the way. Fold peeled part outside (like U see in pic).


Sitten mallaa paperi paikalle. Suojapaperi estää välittömän liimautumisen ja voit liikutella paperia löytääksesi oikean paikan. Paina ja irroita vasta sitten koko suojapaperi.

Then put papers together.  Peeled paper makes it easier to move your paper to right place, it will not stick instantly. Push and now you can rip of peeled paper.


Ja sitten vielä vinkki 3d-teipin käyttöön. Kun olet kuorinut suojapaperin pois. Lisää pikku tipat käyttämääsi liimaa (minä käytin glossy accentia tähän) teippiin, näin ehdit liikutella kuvaa hieman ennen kuin se jämähtää kiinni.

And then tip for using 3d-tape. Put a little drop glue (I used glossy accent) to the tape. That way you can move pic before it really sticks to paper.

Väritetty kuva.

Colored image.
Melkein valmista, jotain se vielä tarvitsee. En vielä ole keksinyt että mitä...

Almost done, it still need something. I don´t know what...


Mukavaa viikonloppua kaikille!

Have a nice weekend! Sorry about my english, I need practice. Hope You understand  :)

tiistai 29. heinäkuuta 2014

Seepia-väritysohje promarkkereilla/sepia coloring tutorial for promarkers

Uusi läppäri tuli vihdoin. Koitetaas nyt sitten kaksikielistä päivitystä. Koska tämä on ohje, on kuvia reilusti, kärsivällisyyttä.

Finaly new laptop arrived. So I try to do this post all so in english. This post has many photos so be patience. This is allso my first post in english, and that´s not my native, so be kind.

Käytin promarkereita väritykseen. tässä lista väreistä:tan, putty, almond, walnut, henna, cocoa, cinnamon

I colored with promarkers. Here are colors that I used:tan, putty, almond, walnut, henna, cocoa, cinnamon


Aloitan aina tummimmasta sävystä.

I allways start with the darkest color.


Sitten lisään hitusen vaaleampaa, edellisen tumman päälle.

Then I added medium, and go over from those areas that i just colored with the darkest color.


 Ja sitten vaaleimmalla koko alue.

And then I go over with the lightest color.


Saadakseni syvyyttä toistan käsittelyn samoilla väreillä.

To have more depth, I repeat it with same colors.


Sitten hiukset.

Then I colored the hair.


Ja taas syvyyttä saadakseni toistan samoilla sävyillä.

And again I go twice with same colors to have some depth.


Ja sitten on ruusujen vuoro.

Then it's time to color roses.


Silmät taisin värittää hennalla ja cocoalla. Tietenkin se kuva unohtui ottaa.

I think I colored eyes with henna and cocoa. Forget to take that photo.


Sitten tausta. Ja valmista tuli.

Then the background. It's done.


Toivottavasti tästä ohjeesta oli hyötyä :) Palautetta saa antaa. Kiitos vierailusta.

I hope this helped you :) Would love to have feedback from this post. Thanks for the visit.